"Life shrinks or expands in proportion to one's courage." - Anais Nin

"I feel like love is in the kitchen with a culinary eye.
I think he's making something special and I'm smart enough to try" -- Obstacle 2 - Interpol

Thursday, August 28, 2014

My Tomato Obsession - Basil Pesto Tomato Bruschetta


  Quite often, I find myself geeking out over food. Usually, it's when I have tried something for the first time and it turned out well. Sometimes it's when I have eaten something so delicious that I can hardly contain myself. On a very special occasion it is both.
  As you know, I have a love affair going on with the tomato. I have seven tomato plants in my garden. They have been slow to produce fruit. But thankfully, my friend (and boss) has kindly been supplying me with her overflow of tomatoes. And I have happily taken every last one! Every now and then I feel a little greedy. I imagine myself as Gollum, rubbing my hand together and chanting "My Precious". Then I take a bite of the sweet fruit and the vision dissipates. I am once again at peace with my tomato fixation.
  Tomatoes are fabulous. But tomatoes and basil pesto... now that, my friends, is a glorious combination! As I was toting home my newly acquired tomatoes from work, I began dreaming of how I would prepare them. During the work week, I like to prepare simple dinners. So I had settled on tomato bruschetta. But then I remembered that I had a lot of basil that I trimmed off of my plant as well. So why not make pesto? 

  Basil Pesto (as I am sure you know) generally has lots of fresh basil, olive oil, Parmesan cheese, garlic, lemon, pine nuts, salt and pepper. I did not have pine nuts so I used peanuts ( which worked well...very rich). I also used roasted garlic olive oil. My advice - Begin with basil and olive oil in the processor. Add the other items to taste. 

  Choose some good bread. I made bread earlier in the week, so I sliced some. Then pan fry the pieces in a combination of olive oil and butter. You can broil or bake the bread but frying it is so yummy! And everything else you are going to eat is super healthy, right?
 
  Once you have fried the bread spread the pesto on top of it. Don't be shy with the pesto. Load each slice with a rather thick layer. You will not regret it!
 
  Next add diced tomato (I used two tomatoes tossed with sea salt), shaved Parmesan cheese and fresh basil to each slice of bread.

 There you have it... the best tomato dinner ever. Well, maybe not ever. But certainly a geek-out worthy fresh tomato dinner that you can eat with your hands...Bonus!


Sunday, August 24, 2014

Rosemary-Lemon Blueberry Peach Pie

  On Saturday, I hosted a game night for several ladies. As you know when you are hosting a game night you must provide delicious nibbles, cocktails and, in my case, pie. I had purchased a ginormous container of blueberries earlier in the week. I also had several peaches on hand. So the decision was made for me. Now, I love fruit pies a lot. And I especially like them when there is more than one fruit involved. As it happens, blueberry-peach is maybe my favorite.
  There are a few quirky aspects to this pie. For one, I choose to flavor the filling with one sprig of fresh rosemary, freshly ground nutmeg, lemon zest and lemon juice. Don't be afraid of the rosemary. It adds a nice depth of flavor but is not overbearing. I also used only brown sugar for sweetener. As you can see in the photo above, I also sprinkled brown sugar on the lattice top.
  I was very pleased with how this pie turned out. The gaming ladies seemed to really enjoy it as well. And there are a few pieces left over...for breakfast. Nothing is better than fruit pie for breakfast!

For the Crust:

(This is my go-to double pie crust.)

2 and1/2 cups flour
1 tsp salt
2 sticks of COLD unsalted butter, cubed
1/4-1/2 cup ICE water (If you are feeling adventurous you can use vodka.)

 By hand: In a large bowl combine the flour and salt. Add the COLD cubed butter and combine using a pastry blender or two knifes. You want to do this quickly so the butter stays cold. Your goal here is to create something that looks like large cornmeal, with the bits of butter still visible.
 Next drizzle in about half of the ICE water. Give it a light and quick mix with a fork. The dough should start looking like a shaggy mess of a ball. Add more water by tbsp until the mass has just started to make a ball that sticks together.
  At this point, pour the ball onto a floured surface. With your hands, quickly form it into a disk. Cut the disk in half. Wrap each half in cling wrap and refrigerate for at least an hour.  These disks can be made ahead. They will stay fresh for about a week.

  When you are ready to use, roll out a bottom crust from one of the disks. Line your pie plate and refrigerate for 15-30 minutes. This is a good time to make your filling. Preheat your oven to 400 F.


Make a small x in the bottom of six peaches. Blanch the peaches in boiling water for one minute.

After you have blanched the peaches put them in a ice water bath. This makes peeling them a snap!
Peel your peaches.

Slice them and put them in a large bowl.

Add two cups of blueberries.
Add 3/4 cup brown sugar, 3 and1/2 tbsp of cornstarch, juice of 1/2 lemon, zest of 1/2 lemon,  1 sprig of rosemary finely chopped, and 1/4 tsp of freshly grated nutmeg. Mix well.
Pour the fruit and the fruit juices into the chilled pie crust.
Quickly roll out the second disk of dough. Cut into lattice strips using a sharp knife or pastry roller.  Arrange your lattice strips on top of the fruit. Fold under the pieces and pinch them together with the bottom crust. 

Bake for twenty minutes at 400 F. Reduce heat to 350 F and bake for about 1 hour.  Or until juices start to ooze everywhere. Oh that reminds me, you may want to line your oven with tin foil.
For the Filling:

6 peaches, peeled and sliced
2 cups blueberries
3/4 cup brown sugar
3 and 1/2 tbsp cornstarch
juice from 1/2 lemon
zest from 1/2 lemon
1 sprig fresh rosemary, finely chopped
1/4 tsp freshly grated nutmeg
heavy cream for brushing on lattice
brown sugar for dusting lattice

  Add all of the ingredients to a large bowl and mix until well combined. Pour the contents of the bowl into a prepared bottom pie crust. Add the lattice top. Roll under the lattice pieces and pinch them together with the bottom crust. Brush the lattice top with heavy cream. Sprinkle with brown sugar.

Bake in a preheated 400 F over for 20 minutes. Reduce heat to 350 F. Bake for an hour. Or until filling is oozing and crust is golden brown.

Let the pie cool a bit. Then eat and enjoy!!

Tuesday, August 19, 2014

Book Recommendation - The Heirloom Tomato, From Garden to Table


  One of the best things about Summer is the abundance of red, ripe tomatoes, preferably plucked right off of the vine. I start dreaming of tomatoes even before I get my plants in the ground. Sadly, my plants struggled a bit toward the beginning of Summer. But it seems as if they are making a comeback. I may have some fruit before Winter after all!
  Because I am right in the middle of my annual tomato obsession, I found myself purchasing this book. I feel no guilt. And let me tell you why....

  • There is a ton of very useful information about many, many different types of heirloom tomatoes.
  • There is helpful information on growing tomatoes (which clearly I may need!)
  • There are yummy looking recipes.
  • And since I tend to geek out about food photography... This book is just filled with absolutely stunning tomato still-life photography.  

 If you are a food dreamer like me you will want to check this book out. Together, we will dream about the perfect tomato... or lots and lots of perfect tomatoes (even better)!


Sunday, August 17, 2014

Some like it hot!! Cayenne Peanut Chocolate Chip Cookies

  One of my greatest pleasures is experimenting in the kitchen. I find coming up with new recipes to be a thrilling adventure. I know, I know it sounds a bit over the top. But all you need to do is witness my unbridled excitement when an experiment turns out to be a delicious keeper to understand this fully. It's true. I'm a nerd. I've been one for a long time. There's no turning back now.
  Here's where these cookies come into play. I was thinking, which I do a lot, about Jeni's ice cream. In particular, a flavor that combined peanuts and cayenne pepper. And since I was also craving chocolate chip cookies....Well, you know where this is going...Cayenne Peanut Chocolate Chip Cookies.
  Let me just say, these cookies do have some heat but interestingly it comes on toward the end. I think they are very tasty but I would use a small scoop when baking. A cookie that is too large might be a bit overwhelming.
In a mixing bowl cream together 3/4 cup brown sugar and 6 TBSP butter.

Add 1 large egg and 1 and 1/2 tsp vanilla. Blend until creamy.

Add 1/2 tsp cayenne pepper, 1/2 tsp baking soda, 1/4 tsp salt, and 1 cup flour. Mix until combined.

Use a spatula to mix in 1/2 cup chopped peanuts and 1 cup chocolate chips.

Use a small sized scoop to place them on a cookie sheet. Bake for about 9 minutes at 375.

Let cookies rest on the cookie sheet for several minutes. Then move the to a wire rack to cool completely.
The Ingredients:

6 TBSP unsalted butter, softened
3/4 cup light brown sugar
1 large egg
1 and 1/2 tsp vanilla
1/2 tsp baking soda
1/2 tsp ground cayenne pepper
1/4 tsp salt
1 cup AP flour
1/2 cup chopped peanuts
1 cup chocolate chips

To Make:
  
Preheat oven to 375 F.

In a mixing bowl cream together  butter and brown sugar until smooth. Add egg and vanilla extract. Mix until well blended. Add baking soda, cayenne pepper and salt. Slowly add flour until well blended. Fold in peanuts and chocolate chips with a spatula.

Using a small cookie scoop, drop the dough on an ungreased baking sheet. Bake for about 9 minutes.

Makes about 3 dozen smallish cookies.


Monday, August 11, 2014

Rainy Day Nutella Cookies

  It is a rare day when I am free of any commitments like work, gardening, house cleaning, social engagements etc. But today happens to be one of those lovely days. And it has also been rather rainy as well. In my world, the rain helps prevent outdoor distractions. Not that I don't live for distractions, believe me I do. But sometimes I need a day to breathe and maybe just do whatever I  choose...like catch up on Dr Who (I am hopelessly behind), bake bread and make cookies.
  The cookies came about in an attempt to use some Nutella from ONE (there are two!) of the ginormous Costco jars.  Not that I won't make my way through them both, because believe me I will. It's more of an attempt to thwart the inevitability of passing out with Nutella spoon in hand and a chocolate smeared face. Dare to dream!
  These cookies are delicious and super easy. In fact there are only five ingredients. And friends, the dough is made in one bowl. If you dig a yummy cookie that is easy and requires little clean up this is totally for you.
Begin with two cups of Nutella.

Add one cup of flour.

Add two eggs.

Add 2 tsp of baking powder.

Add 1 tsp vanilla extract.

Mix to combine.

Roll each bit of dough into balls about 1/2 inch or a bit less. 

Bake for about 9 minutes. The cookies are delicate just out of the oven. Let
them rest for a bit on the cookie sheet then move them to a wire rack to
cool completely.

Ingredients:

2 cups Nutella
1 cup AP flour
2 eggs
2 tsp baking powder
1 tsp vanilla extract

To Make:

Preheat oven to 350 degrees.

In a large bowl mix together all five ingredients. Stir until well combined. Using your hands (gotta get a little dirty every now and then) roll the dough into 1/2 inch balls and place on cookie sheets. Bake at 350 for approximately  9 minutes. Let the cookies rest on the cookie sheet for a bit then move them to a wire rack to cool completely. Makes about 3 dozen cookies....give or take a few.

Note: It is also tasty to sprinkle these with sea salt. If this is your thing, do this right after you have taken the cookies out of the oven.

Now, eat and enjoy!!


Wednesday, August 6, 2014

Summer Wishes


  Fire. It's pretty amazing to sit around a fire with a cocktail in your hand and close friends around you on a Summer evening. Right?

  You know what makes it even better? Making wishes on wish paper. Wish paper, as far as I can tell, is plain old colored tissue paper cut into 2 inch squares but packaged very nicely.

  What you do - You take a piece of this paper. Our sheets were red which makes me very happy as it is my favorite color. You write a wish on the paper and fold it up. Then you light it on fire and let go. At first it drops down a bit but as the burning intensifies it floats upward.

  The little wish continues upward like a floating star until it burns out entirely. It is beautiful.


  See that little dot floating on the left side of the above photograph. That is my wish. It's a grand one. A secret one. And I will never ever really know if it comes true. But really, those are the best kinds of wishes anyway.

  So my advice.... take some time, slow down and make a wish. Watch it throw off its' last light and disappear. And the wish... Maybe it will come true. Maybe it already has. Maybe you will never know.

Sunday, August 3, 2014

Black-Bottomed Dulce de Leche Pie...oh my!!

  Every year several of my closest friends make a pilgrimage to Sylvania Ohio.  We descend on a rather large home complete with the perfect patio and pond view. The house is the home of one of my   longtime friend's little sister (also my friend). We all lovingly call this house Paula's B and B because she is the best hostess ever. This stay is always full of great food, awesome beverages, wonderful friends, tons of relaxation and laughter. And generally, she supplies all of the above in abundance! But I always enjoy making something to take with me on this grand trip.
  And this my friends is where the Black Bottom Dulce de Leche Pie comes into play. As some of you may remember, I have a part time job at Williams Sonoma. Now, this is a fun place to work full of awesome products and yummy food. Sometimes this is a problem.... like when the superb  Argentinian dulce de leche is on sale and you feel compelled to buy two jars. Then you find yourself eating almost a whole jar in less than a week. It is a problem. A big problem. The only solution is to make something out of the remaining yumminess before you explode in a cloud of milk caramel. Enter our star...the Black Bottom Dulce de Leche Pie!
Let me tell you... This is a deliciously easy pie to make. And it requires no baking. Give it a whirl. You will enjoy it - both the making and the eating!!
First make the Oreo crust. It only requires two ingredients. And just needs to spend a bit of time in the fridge before the filling is added.
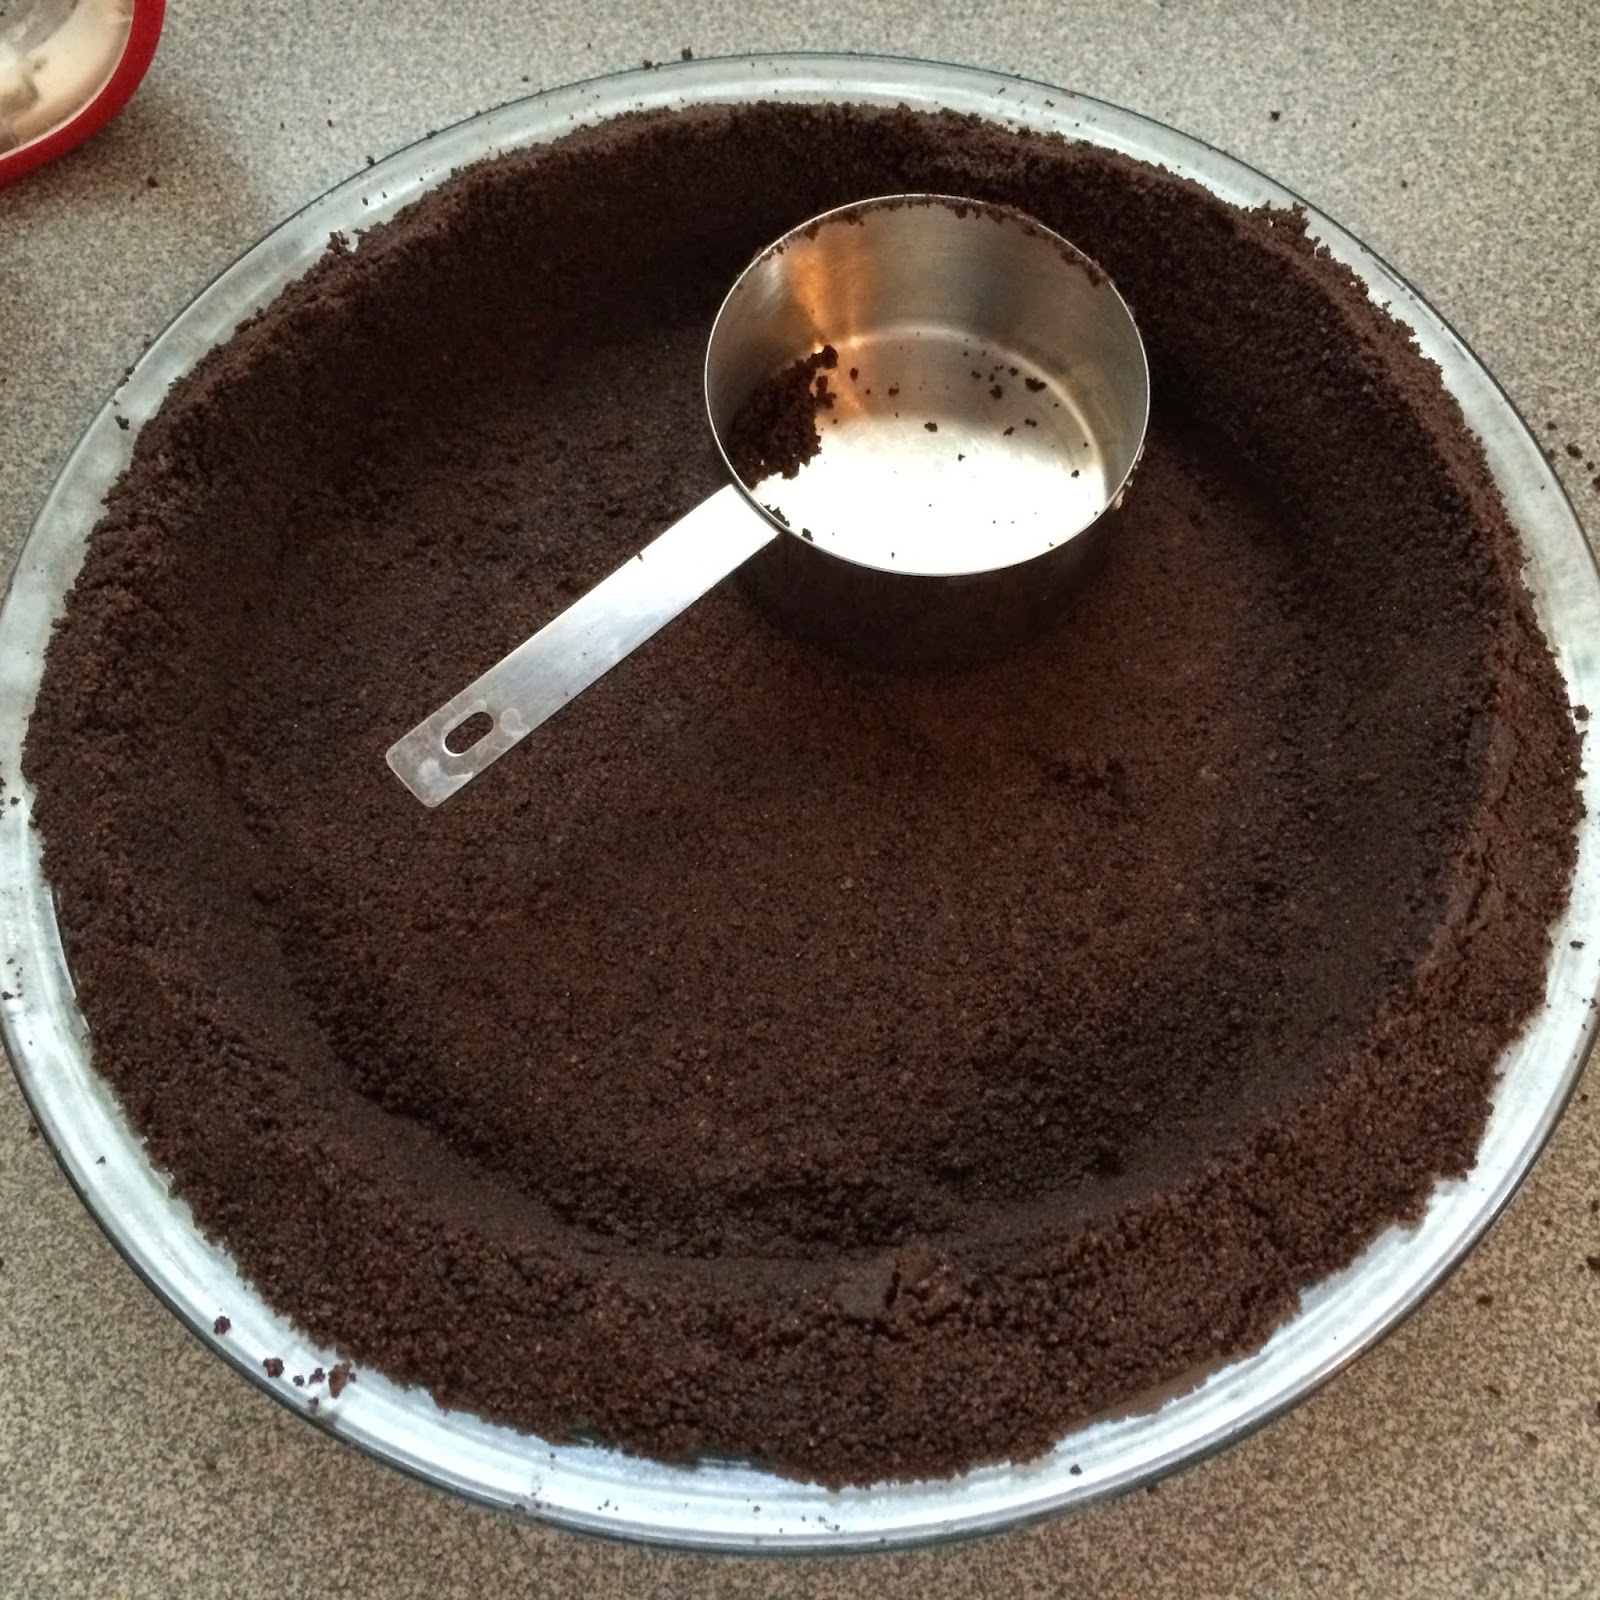
Here's a simple way to shape the crust. Use the back side of a measuring cup to help press the crumble into the pie plate. It makes it super easy!
Make the ganache. I use a microwave but you need to be careful not to melt the chocolate to quickly.  In my tiny low powered microwave, I did about 45 seconds with a pause in between for whisking.
Add the ganache to the chilled pie crust. Chill. Try not to eat it all before it gets in there.
Whip the heavy cream and set it aside. This is when a second mixer bowl would come in handy!
In another bowl mix together the dulce de leche, cream cheese, vanilla and sugar. Blend until creamy. And again, try not to eat it all. You will make yourself sick!!
Fold the whip cream into the dulche de leche mixture. 
Carefully spoon the caramel cream on top on the ganache. 
Doesn't that look divine? 
Make some more ganache to top the pie. I like to spoon this mixture into a small ziploc bag.  Then I snip off the very end and use it to make designs on the top. 


For the crust:

24 whole oreos
1/4 cup unsalted butter

In a medium bowl or food processor,  add the Oreos and blend until the texture of coarse meal. Add the butter and blend until well combined. Place the mixture into your pie plate and press on the bottom and sides evenly. It helps to use the back side of a measuring cup. Refrigerate the crust for at least an hour before use. 

For the Pie:

1 cup semisweet chocolate chips
1/3 cup heavy cream
8 ounces cream cheese, room temperature
1/2 cup dulce de leche, room temperature
1/4 cup sugar
1 tsp vanilla extract
3/4 cup heavy whipped heavy whipping cream with 1 tbsp sugar added

For the Topping:

1/3 cup semisweet chocolate chips
1 tbsp heavy cream


Instructions:

Put 1 cup chocolate chips and 1/3 cup heavy cream in a microwave safe container. Heat for 45  seconds or so until smooth after whisking. Pour this mixture into your prepare pie crust and chill until you are ready to add the other layer.

Whip 3/4 cup heavy cream in the bowl of a stand mixer until the cream has fairly stiff peaks.  Adding  1 tbsp sugar just after the cream starts to form peaks. Set aside.

Beat the dulce de leche, cream cheese, sugar and vanilla in a mixture until smooth. Fold in the whipped cream. Spread this mixture on top of the ganache in the bottom of the crust.

Melt the remaining 1/3 cup chocolate chips and 1 tbsp heavy cream for about 20 seconds (Time will vary depending on microwave) being careful not to heat too quickly. Stir until smooth. Use this to make beautiful designs on the top of the dulce de leche layer.

Now eat and enjoy!!